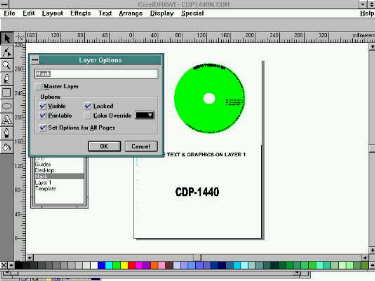
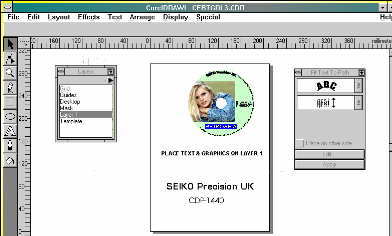
From the menu Choose Layout, Layers Roll-up. From the keyboard press Ctrl+F3
.
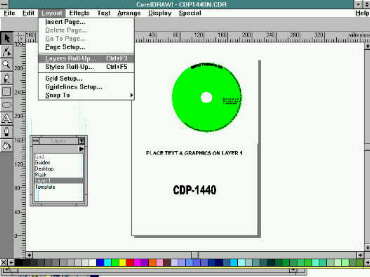 |
Layers explained in Detail
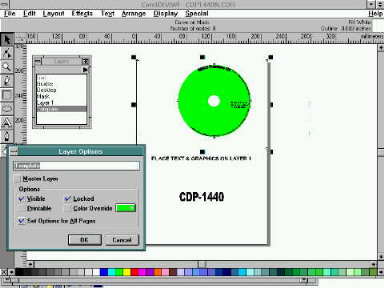
MASK. As shipped this layer is locked and nothing can be altered or chosen on the Mask until you have unlocked this layer. Press Ctrl+F3 highlight Mask, double click then untick the locked box.
This layer complises of one elipse which is central in the CD and has a height & width of 43mm. The other item on the Mask level is a Curve on mask (number of nodes 8). This item is in reality two items (and can be separated using Arrange, Break Apart. (Ctrl+K). There is a rectangle which is non-printable and a curve which is printable. If you do break this item apart ensure you Combine them back again (Ctrl+L), prior to saving or trying to print the file.
LAYER1 As shipped this layer is empty. You will add your Images, Text etc to this layer for printing. This is your working layer.
TEMPLATE This layer is used purely for display purposes. It is locked as shipped and is non-printable. There are three objects on this layer comprising of an Ellipse with a width and height of 119.6mm, and two Text objects. If you have difficulty seeing the Ellipse change the colour (it will not print), by unlocking the template layer, choosing the Ellipse and then clicking on any of the Colours on the base of the screen. Ensure this layer is locked prior to printing or saving the file.
Printer adjustments
Because of the precise nature of CD Printing all printers may need some slight adjustments to the CorelDraw file to centralise your image on the media. The printer is supplied with some dummy CD's in order for you to carry out initial testing. It should be noted that just about every brand of CD-R Printables that we have tested have marginally different sizes of both printable surface as well as inner (non-printable) holes. AVD Computer Services can supply a range of Printable CD-R's for the SEIKO Precision CDP-2000, which have been optimised for Ink Jet printing and have a very small inner hole in order to maximise the impact of your design. These have inner holes of 19mm and a printable surface of 118.4mm. These are available in White or Silver. These should be available at little more than the cost of normal non-printable CD-R's.
To test the Printer on CD-R simply create a Rectangle on Layer 1 and give it a colour we recommend a very light colour and this way the dummy CD is reusable using progresively darker colours. Add some test to the Top, Right, Left and Bottom of the CD shape. These are purely for alignment purposes. Load a dummy CD into the Caddy, insert caddy into the rear of the printer (ENSURE YOU MOVE THE PAPER GUIDE ON THE CUT SHEET FEEDER FULLY TO THE LEFT AND REMOVE ALL PAPER FROM THE SHEET FEEDER). Open the lid of the printer and push the right hand lever to the CD position. Now try to print the file and compare the output to your screen. Check that the Inner centre is round and no ink is on the plastic inner. Ensure that the text is fully printed (as per the screen display) and that there is no (or very little) ink on the edge of the dummy CD. If all has gone well and the CD is as you would expect you should delete the Rectangle and alignment text, save the file and use this as your new template. If you have any mis-alignment problems proceed as below MISALIGNMENT . You will probably want to reduce the size of the inner circle down to 19mm especially if you are using the SEIKO Precision CD-R Printables You may also wish to change the size of the Outer circle to match the CD-R's you will be using.
Changing the size of the printable area
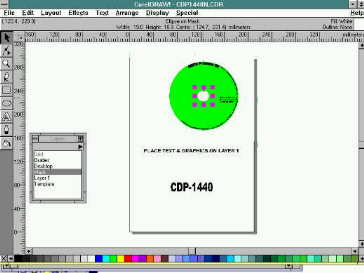
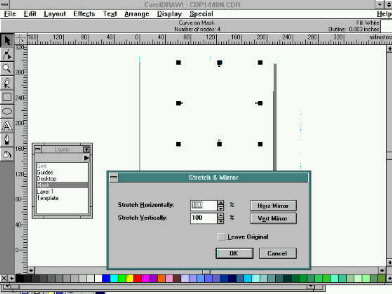
Inner Circle. As previously explained the printable area is defined on the MASK layer. Unlock this layer (Ctrl+F3) and choose the Inner circle by clicking on it. At the top of the screen should be displayed the current size of this area, by default 43mm. You Reduce (or Increase) the size of this area by percentages. Therefore to reduce the size of this from 43 to 19mm choose Effects, Stretch & Mirror (Alt+F9) and enter 44% on both Horizontal & Vertical. The display should now show a size of 19mm. Further minor adjustments can be carried out in the same manner. You can carry out the adjustment by 1% units.
 |
Outer Circle To change the size of the outer area is slightly more difficult but follows the same principles. Whilst the Mask layer is unlocked Click in area to the top left of the page. The display should now show Curve on Mask Number of nodes:8.
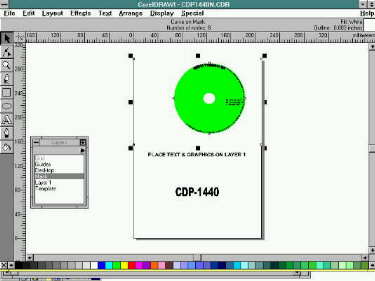 |
Press Ctrl+K to break apart the two objects. Click the mouse at the lower part of the page to de-select the two items. You will no longer see the CD Template. Click the mouse on the area where the CD was displayed and the Display should now read Curve on Mask Number of nodes:4 and you can make out four small squares arranged in a Square fashion (one at Top,Left,Right, & Bottom). If the small squares are arranged in a Rectangular fashion (at each corner) you have chosen the wrong part of the mask. Equally if the display shows Ellipse on mask then you have chosen the Inner circle. If you are having difficulties in selecting the Outer circle and you keep getting the Rectangular shape try sending this to the Back (Shift+PgDn) then de-selecting and trying again. Having ensured you have got the correct Outer Circle you can adjust the sizing using the same technique as above (Alt+F9). Remember that fine adjustments can be made in that 105% of 95% is 99.75%.
 |
Once you are satisfied with the Outer circle sizing you should now Combine the two items into one again. Whilst the Outer circle is chosen, hold down the shift key and click on an area to the Top left of the page The display should now show 2 objects selected on Mask. Combine these (Ctrl+L) and your CD Template should now reappear. You may wish to adjust the sizing of the template Ellipse in a similar manner as this makes the positioning of your text and graphics easier..
Changing the position of the Printable areas
As shipped the two printable areas are centralised at the same spot. It is possible that you find that this centralised position is not in the middle for your particular combination of Printer & Caddy. This will typically be displayed by Images being printed someway down the CD or to the left (or right) of the centre
You use a similar method as above to adjust the positioning of the printable areas. a. Unlock the MASK, choose the Curve on mask :8 node object and Break this apart. De-select this then select the Outer Circle. With the Shift key held down Click on the Inner circle so that the display shows 2 objects selected on Mask. You can now nudge these 2 objects by using the arrow keys. Note that the amount these two objects are moved depends upon the nudge settings. These can be found under Special, Preferences (Ctrl+J) and by default is set to 1mm. We would suggest changing this figure to 0.1 or 0.3mm depending on how far out the print is. Once you are happy with the positioning of the printed image you should ensure that you combine the Outer Circle and Rectangle objects back together again. De-select everything Choose the Outer Circle, Click on the Top left of the page, so that the display shows 2 objects selected on Mask then Combine (Ctrl+L). Now lock the mask. For display purposes you will probably want to change the position of the Ellipse on the Template layer to the same position. Unlock the Template layer , select the Ellipse and nudge this by the same amounts as you nudged the Mask objects. Ensure to re-lock the Template layer and save the file.
This file can now be used as the template for your particular setup. Getting it right at this stage is important as this will be the basis for all of your future CD Images. It should be remembered that CD-R Printables may vary in size by different manufacturers so every time you change to a different brand the above procedure may be necessary or you may prefer to have different CDR files by CD-R manufacturer..
CorelDraw Hints
Please note that by default CorelDraw creates Back up files virtually every time a CDR file is opened. Depending upon your set up you may well end up with many hundreds of MB's of the *.BAK files. These are not really required so every now and again check the directory for these files. They can be safely deleted, once you are out of CorelDraw.
Circular Text is fairly simple within CorelDraw. First add your text in your chosen font and size and colour on to Layer1. Secondly unlock the Template layer and select the Ellipse. Copy this (Ctrl+C) then re-lock the Template. Change back to Layer1 and Paste it (Ctrl+V). Whilst this Ellipse is selected, hold down the shift key and click on the text, the Display should now show 2 objects selected on Layer1. From the menu Text, Fit text to path (Ctrl+F) and the various options for positioning the text are given to you. Note that any changes are only effective once you click Apply. Once you haver got the text in the position you want you can delete the Ellipse. Simply de-select then select the Control Ellipse on Layer1 object and then press Del.
 |
Designing your CD layout Because of the nature of the printable surface on the CD-R's some combinations of colours will bleed into each other. We find this particularly true of Red on Yellow, and even Black on Darker colours. You may need to adjust your design and accept slightly paler backgrounds in order to obtain acceptable results. In all cases the quality of the print is very much media dependant. We would strongly suggest that paler graphics look and perform best, and dry quicker. This is also true of any backgrounds used. If you do use strong colours then these should be limited to the outer circle i.e Outside of the 43mm . If you use strong colours inside this 43mm then not only will the print take a long time to dry but there is also the possibility that on playing or recording the CD that the CD will stick in the CD-Drive possibly causing damage to the Drive. The first 43mm is where the CD-Drive comes into contact with the CD-R and a great deal of heat can be generated causing the ink to melt
Back to the Top